Roses are Red, Violets are Blue. You are the Best Teacher and I Nominate You!
 Thursday, February 5, 2015 at 6:23AM

The Ottawa Network for Education will recognize the achievements of outstanding educators and celebrate public education at the 14th annual Capital Educators’ Awards on May 21, 2015. Award recipients are announced at the gala dinner aptly called EduGala.
The Capital Educators’ Awards recognize the achievements of outstanding educators and celebrates public education in our community – across the entire spectrum from kindergarten to PhD. All educators who have classroom teaching responsibilities at one of the 10 partner institutions in Ottawa are eligible to be nominated. Anyone can submit a nomination form! Nominate today!
Last year 18 educators were awarded Capital Educators’ Awards at EduGala!
Here is how these educators inspired our youth:
Sherri Billowits a teacher at St. George School. When presented with a challenge, Sherri is not one to shy away. With no prior experience teaching non-verbal children, she jumped in with both feet, asking questions of parents and visiting a therapy centre to learn more. Her goal is to fully integrate these children into her class.
Her innate ability to recognize when a child really wants to learn – even with no words – is remarkable.
The other children in Sherri’s class also learn a valuable lesson of acceptance. They learn that they too can help a special needs child. In reminding parents that their community is an essential part of assisting their children, Sherri has helped these students take their rightful place in society.
Sherry Poirer was also a winner at last year’s awards. Sherry teaches at Algonquin College and has worked in various nursing specialty areas. Her primary area of interest and passion is Community Health Nursing, specifically working with vulnerable or marginalized populations. In keeping with her Progressive Adult Education philosophy, Sherry sees education “as life itself”. She believes that when education develops the person (as well as the mandated professional skills), the learning experience is enhanced and society, as a whole, benefits. Strategies that encourage active participation, connection to real-life situations and personal reflection are commonly used in her classes. Oh, as well a fair bit of humor!
To nominate your favorite educator today visit www.edugala.ca!
Get out Get Active
 Thursday, January 15, 2015 at 5:50AM
 it’s officially the season for hibernating, eating more and exercising less. When curling up on the couch seems far more appealing than heading outside, it takes a little motivation and preparation to keep the family active throughout the winter months.
Here are some ways to keep your family active:
Try skating as a family. Ottawa has many indoor and outdoor ice surfaces that offer family and recreational skating. The website has searchable schedules by community. Family skating is a great way to meet people from your neighborhood and keep active. Always remember to wear your helmets when ice skating. Ottawa Public Skating Schedule.
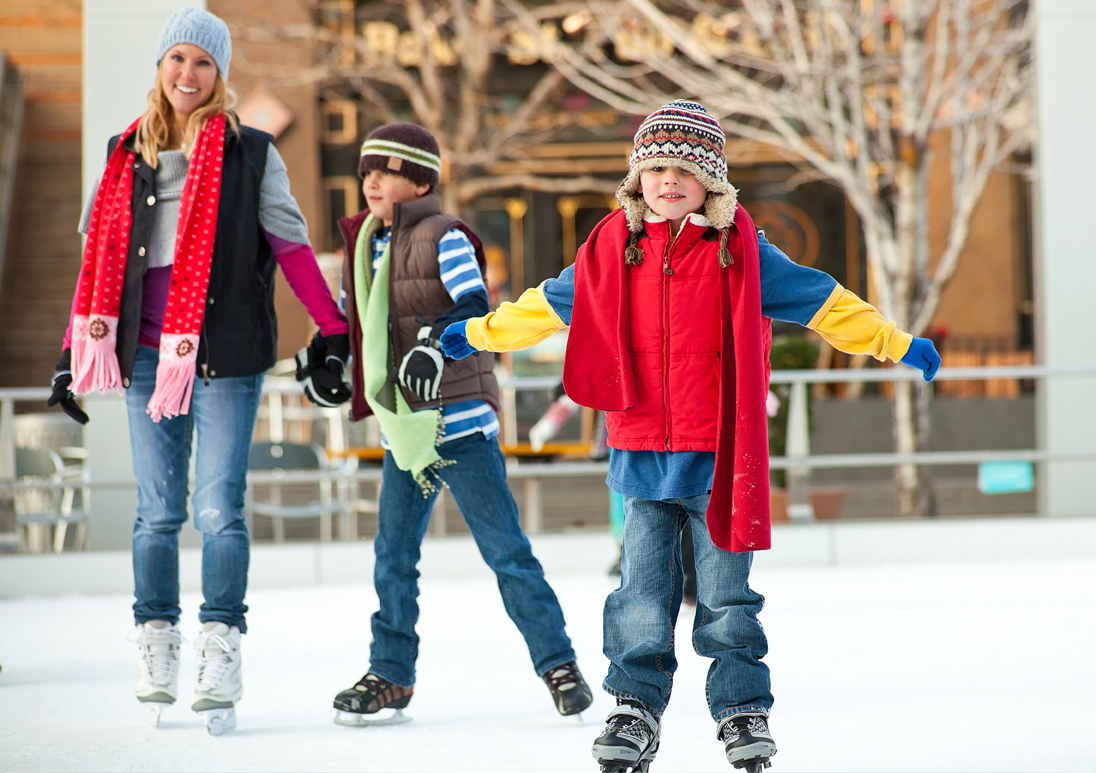
Visit the Community Centre The city of Ottawa operates over 50 Community centres that focus on recreational, social, and cultural activities for everyone. Check the schedules for each location to learn more about ways you can stay in shape and learn new skills. Many centres offerer special programs during school breaks and holidays. Ottawa Community Centres.
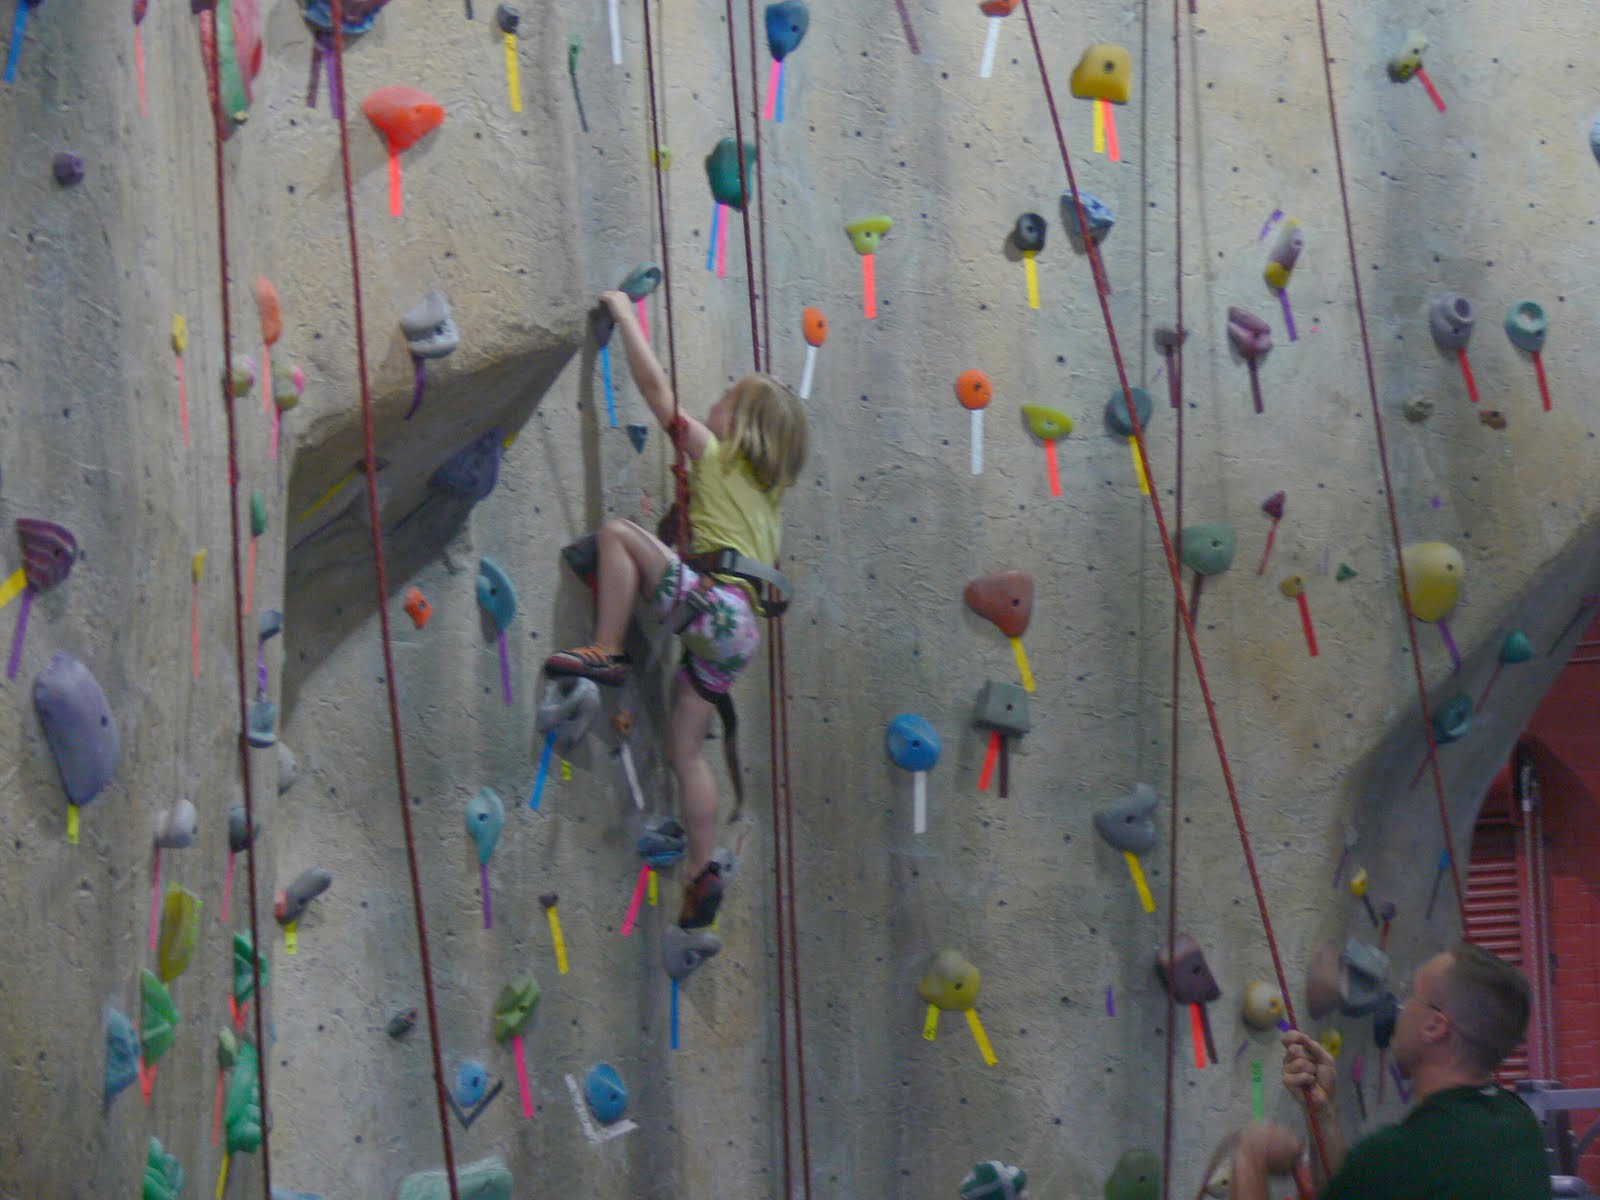
Take your kids climbing. There are lots of indoor places to climb, a perfect activity for days when the weather is not so agreeable. A quick lesson on the basics of climbing and you’ll be set. Kids use their whole bodies while climbing and it is a great activity to teach problem-solving and help build confidence. And if the kids love it, you can move the adventure outdoors in the spring or summer. Try Vertical Reality or Coyote Rock Gym. There is also a small rock climbing wall at Fun Haven.
Make a splash. Kids love to make a splash in the winter time. There is nothing more exciting than swimming at an indoor pool while it is cold outside. Family swim times are available throughout the week at city pools. City of Ottawa Website. It can also be an adventure to visit the indoor water park at Travelodge or the Wave Pool in Kanata.
Bring it inside: There are so many wonderful indoor playgrounds in the Ottawa area and each one is unique. From trampolines to bumper cars, bowling and everything in between, there are many great offerings to keep a family active. Keep your eye on their websites to find specials and coupons that come up from time to time.
Funhaven
Sky Zone Indoor Trampoline Park
Walk around the block. Bundle up and get out for a walk with your family. Take a look at all of the beautiful decorations going up around your neighbourhood. Gaze at the stars or just have a great talk while you walk.
Celebrate the first snow. Make tracks. Make snow angels. Make a snowman. Often the first snow does not last, so embrace it. Kids will be excited to get out there and catch snowflakes on their tongue and dance around. Find your inner child and remember just how fun those first snowfalls can be.
Getting outside and being active with your kids is important. It sets them up for a lifetime of active living. If you make it a habit for them now, it will continue as they get older. Weather can make this challenging, but if you get out as the weather gets colder, it will be even easier when it warms up again. Being active as a family also creates so many great memories they will cherish and keeps the conversation going as the kids get older.
Stay up Late and Celebrate
 Saturday, December 27, 2014 at 10:43AM


Five – Four – Three – Two – One!
The countdown is on to make plans to ring in the New Year! Dancing? Dining Out? House Party? Family Gathering? There is no shortage of fun events and outings going on around town this year. For me, a cozy New Year’s Eve at home with my family beats all.
Kids love to create, celebrate and stay up late. So I am giving them lots of options this year. We are going to have a party in our own living room and whoop it up until the ball drops to ring in 2014.
Create
Let kids decorate and personalize their own party hats and noisemakers with markers, glitter, and tissue. Use plain paper cones or wide headbands for the hats.
Make a Memory Book or Time Capsule. Give each child a photos of some their favourite 2013 memories. Gather fun keepsakes and use an old jar or scrap book put them together. Encourage kids to comment on photos and tag items with their memories.
Create a special kids table. Set up a fun kids table giving them a fun place to sit. Decorate it with garland and other Christmas stuff you already have around.
Decorate. Add a little sparkle to your table by lighting a couple of sparklers as the countdown starts.
Celebrate
Bake a Wish Cake. This is a fun Greek tradition in which you bake a cake with a lucky coin or other trinket hidden inside. The recipient of the coin is said to have good luck for the upcoming year.
Watch home movies and reminisce. Cuddle up with some popcorn and look over your favourite moments from the past year together.
Dress up and have a dance party. Kids love to dress up, so let them put on their best clothes, push the furniture back and have a dance party. Make it even more fun by wearing boas, tutus, silly hats and glasses.
Make Memory Books. Provide each child with a small notebook and have them write and draw their memories from the year.
Talk about resolutions and what they mean. Have kids write down what theirs are for 2013
Stay up Late
Celebrate Midnight in Another Country. Let’s face it, some of our kids are just too young to make it until midnight. Why not celebrate the New Year earlier in the day alongside another country in another part of the world. If you are in CAnada for example, you could celebrate alongside Paris which would be 6:00 p.m Oh La La.
Ring it In. Set all the clocks, alarms, and cell phones to go off at midnight.
Keep them Busy. Do hourly activities to help kids count down the time. Write them on a slip of paper and put them inside of a balloon or envelope.
 Midnight Milk and Cookies Toast
Have a balloon drop at midnight. You can make your own balloon drop using a drawstring garbage bag. Till it with balloons and hang it upside down. Then undo the drawstring at midnight and let the balloons shower down.
Events Around Town
If you are the type that can’t live without the fireworks and full scale festivities, Ottawa has a number of family friendly events to choose from.
Head down to Sparks Street for their Capital Countdown. There will be food, favours, entertainment and the midnight Maple Leaf Drop. Dress warm. It is forecast to be a cold one.
Rick Chiarelli’s Alcohol-free Family New Year’s Eve party has a pirate and princess them this year. What fun? The party starts at 6:00 p.m. at Centerpoint – Ben Franklin Place with Fireworks at 10:00 p.m. Kids will love the magicians, dancers, face painters and other live entertainment.
Closer to the downtown area? Celebrate at Ottawa City Hall Scottish style. The 2nd Annual Scottish Hogmanay starts at 6:00 p.m. There will be Scottish dancing and music, the Glengarry Pipe Band, Scotch tasting, skating on the Rink of Dreams and fireworks at midnight.
However you celebrate, my wish is that you and your family enjoy a fun-filled evening and that 2014 be filled with health and happiness.
Julie
Make a New Year's Time Capsule
 Friday, September 5, 2014 at 3:37PM
This is a fun and easy project that the whole family can do together.
Start by asking a few questions to get the kids thinking about what they would like to add to the box:
- Where do you think we will live in the future?
- What will you remember about this year?
- What do you like best about your world right now?
- Are there any major events happening in your life this year?
- What do you think that world will be like in the future?

Now have them collect things that they would like to save in the time capsule.
- A 2014 penny
- A recent photograph
- A Christmas or Valentine card they received recently or a birthday invitation
- A newspaper clipping.
- A ticket stub
- Their hand / foot print.

- Their age and grade
- Their teachers name
- Their best friend
- Their favourite food
- What they got for Christmas
- What they plan to do for their birthday this year.
- Their favourite place to be
- Have them draw a picture of how they think they will look in four years.
Tuck the items and letters into your decorated box and tape it up. Hide it in a safe place
Fun and Festive Christmas Ornaments to make with the Kids
 Thursday, December 11, 2014 at 11:11AM
 Cookie Cutter Ornaments
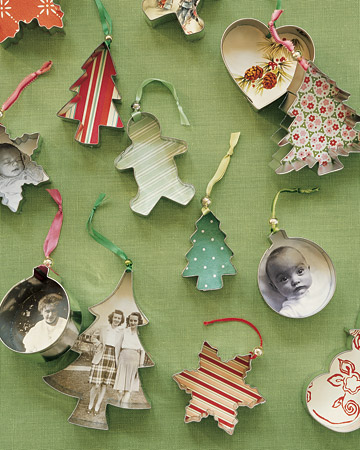
- Aluminum cookie cutters
- Patterned paper
- Color-photocopy pictures
- Card stock
- Pencil
- Scissors
- White craft glue
- Needle
- Ribbon
- Beads
Button Ornaments
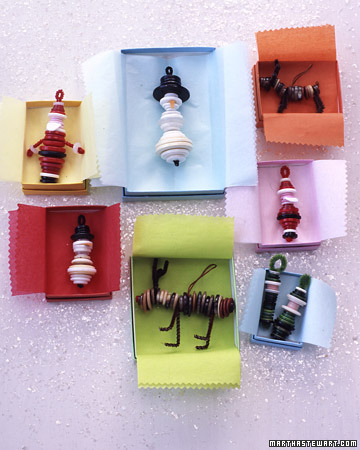
- Pipe cleaners
- Buttons
- Felt
- Craft glue
- Thread
Pipe Cleaner Snowflakes
 These directions yield a snowflake that is 6 inches in diameter, with three arms attached to each spoke. To create larger or smaller snowflakes, simply adjust the proportions of the pipe-cleaner pieces accordingly. You can also use more or fewer arms on each spoke.
- Wire cutter or pair of old scissors
- Three 6-inch pieces of pipe cleaner, plus six 2 1/2-inch pieces, six 2-inch
- Needlenose pliers
 STEP 1Choose patterned papers or color-photocopy pictures onto card stock. Trace cutter on top; cut out. Dab white craft glue along cutter's edge. Press paper in place; let dry.STEP 2Thread narrow ribbon through needle; poke between paper and cutter, and wrap ribbon around top of cutter. Slip a bead over ribbon's ends; knot.
- Pipe cleaners
- Buttons
- Felt
- Craft glue
- Thread
STEP 1Bend a pipe cleaner in half and twist once at the top for a loop.STEP 2Slide buttons over pipe cleaner ends, slipping one end into each hole (if the button has four holes, use two diagonal ones). Use larger buttons for bellies and hat brims.STEP 3When finished, twist ends of pipe cleaner to secure, and trim.STEP 4For reindeer legs and antlers and for Santa's arms, bend 2-inch pieces of pipe cleaner in half, slip on between buttons, and twist.STEP 5Glue on felt for Santa's beard and the snowman's nose.STEP 6To hang the reindeer, loop a thread around its middle and tie. These directions yield a snowflake that is 6 inches in diameter, with three arms attached to each spoke. To create larger or smaller snowflakes, simply adjust the proportions of the pipe-cleaner pieces accordingly. You can also use more or fewer arms on each spoke.STEP 1Using a wire cutter or old scissors, cut three 6-inch pieces of pipe cleaner. Then cut six 2 1/2-inch pieces, six 2-inch pieces, and six 1 1/2-inch pieces. STEP 2Twist 6-inch pieces together at their midpoints to make a six-spoked asterisk. Tighten twist by clamping down with needlenose pliers. STEP 3Center one 2 1/2-inch piece at the midpoint of a spoke, and twist onto spoke. Tighten twist with needlenose pliers. Repeat on remaining 5 spokes. STEP 4About 1/2 inch from an arm attached in step 3 (toward spoke's tip), center one 2-inch piece, and twist onto spoke. Tighten twist with needlenose pliers. Repeat on remaining 5 spokes. STEP 5About 1/2 inch from an arm attached in step 4 (toward spoke's tip), center one 1 1/2-inch piece, and twist onto spoke. Tighten twist with needlenose pliers. Repeat on remaining 5 spokes. Trim arms if needed.STEP 6To hang, glue a loop of cord to the back of a spoke.
Festive Cookie Totes
Pringles Can Cookie Totes
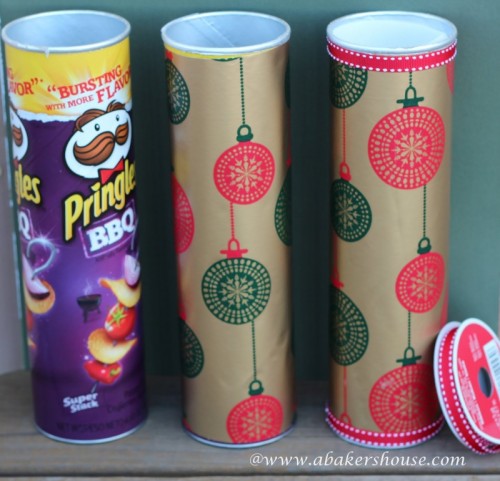 You will need:
- Pringles Can
- Wrapping Paper
- Wax Paper
- Parchment of Freezer Paper
- Ribbon
- Blue
- Muffin Liners
Cut the wrapping paper to fit around the can and glue it in place. Cut the ribbon and wrap it around the top and bottom of the tube. You may want to use a little glue here too. Cut the wax paper a similar size and roll it so that it fits inside of the can. Put your cookies into the muffin cups and then slide them into the tube.
Foil Box Cookie Totes
- Empty Aluminum Foil, Wax Paper, Plastic or Parchment Boxes
- Wrapping Paper
- Tissue Paper
- Buttons
- Hole Punch
- Ribbon or Twine
Start by cutting off the sharp edges from the boxes. Wrap all the way around with decorative paper and line the inside with tissue. Fill cookies. Glue button to the top lid and Punch a hole in the bottom lid. Tie to button to close box.
Handmade Keepsake Ornaments
How our tree has grown since the kids have come into our lives. Each year, as we put up our tree, we take time to look at the ornaments that we have collected over the years. There is the one we got for a wedding gift, our first home, baby’s first Christmas times two – one pink and one blue. We have received some ornaments as gifts over the years as well. There are ballerinas and Legos, drum sticks and running shoes. Our tree tells a story of us, our family.
Every time we visit a new or interesting place, we try to pick up a souvenir ornament in the gift shop. It is a great way to remember some of our adventures. Some years, the kids have made beautiful keepsake ornaments at school. I also like to make a few at home. The salt dough handprints are my absolute favourite. I try to do them every couple of years as the kids grow. Last year we decorated shells from a trip to Mexico and this year we are making time capsule ornaments for the year 2013!
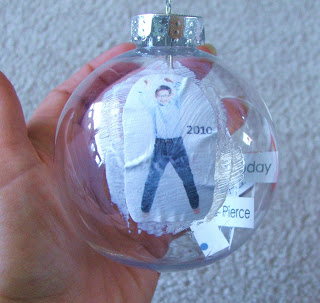 Time Capsule Ornament
You will need:
A clear plastic ornament (available at craft stores)
You child’s school picture
Paper
Small piece of ribbon
Modge Podge
Sponge Brush
I started by helping the kids to write out their memories and milestones from this year – what grade they are in, their teacher’s name, their best friend, favourite book and tv show, trips we took and what they did for their birthday are all good things to record. You could also print these out on the computer.
I gently took the top off the ornament by squeezing the metal prongs. Then I cut the lines of printed memories into strips and slipped them into the ornament and replaced the top.
MITK Tip: Buy more than one ornament. You never know!
I cut the school picture into a circle and painted modge podge on the back to stick it to the ornament. Then I brushed another layer of modge podge on the edges of the picture and smoothed it out with my fingers. Once the edges dried, I brushed another coat of modge over the entire photo.
I topped it off with a pretty ribbon hanger.
Salt Doug Hand Ornament
This is what you need: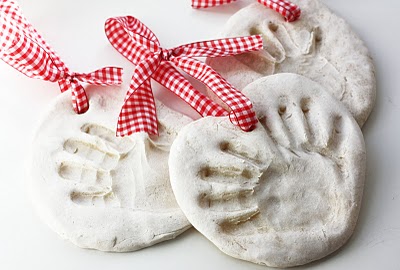
4 cups of flour
1 cup salt
Food coloring
Large Mixing Bowl
Water to moisten
Cookie sheet
A little oil
Small rolling pin
A drinking straw
Ribbon
A plate for a guide
Paint to decorate
This recipe will make three ornaments.
In your mixing bowl ~ gradually blend in your flour & salt with water to make the dough.
MITK tip *Remember to add gradually, because you can always add more water but it is hard to take it away.
Divide dough mixture into three parts, lightly oil the cookie sheet, form and roll out dough. Be sure to make the dough thick enough to form the handprint.
Use the drinking straw to put a hole in the top for the ribbon.
The best part is letting the kids press their hands into the dough to make their prints.
Place in a 150* degree oven for an hour. Or you can air dry overnight for 24 hours.
Once dry, paint or decorate as you like.
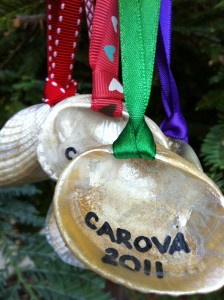 Shell Keepsake Ornaments
This is a simple way to keep memories of your family vacations.
While away on vacation last year, we collected shells on the beach. I tried to find ones with holes in the top to make it easy to hang them on the tree. When we returned from our trip, I tucked the shells into the Christmas box.
What you need:
Shells
Ribbon
Sharpie
Sparkly paints
All you need to do to make this holiday ornament is to write the name of the place where you collected the shells and the year. With writing on the shell, I gave the kids some sparkly paint and had them decorate as they liked. Last, I tied a pretty ribbon to the top to ready them for the tree.
I hope that you and your family will enjoy creating these ornaments for your tree and that you will continue to add stories as the years go buy.
Happy Holidays.
 STEP 1Choose patterned papers or color-photocopy pictures onto card stock. Trace cutter on top; cut out. Dab white craft glue along cutter's edge. Press paper in place; let dry.STEP 2Thread narrow ribbon through needle; poke between paper and cutter, and wrap ribbon around top of cutter. Slip a bead over ribbon's ends; knot.
- Pipe cleaners
- Buttons
- Felt
- Craft glue
- Thread
Bend a pipe cleaner in half and twist once at the top for a loop.STEP 2Slide buttons over pipe cleaner ends, slipping one end into each hole (if the button has four holes, use two diagonal ones). Use larger buttons for bellies and hat brims.STEP 3When finished, twist ends of pipe cleaner to secure, and trim.STEP 4For reindeer legs and antlers and for Santa's arms, bend 2-inch pieces of pipe cleaner in half, slip on between buttons, and twist.STEP 5Glue on felt for Santa's beard and the snowman's nose.STEP 6To hang the reindeer, loop a thread around its middle and tie. These directions yield a snowflake that is 6 inches in diameter, with three arms attached to each spoke. To create larger or smaller snowflakes, simply adjust the proportions of the pipe-cleaner pieces accordingly. You can also use more or fewer arms on each spoke.STEP 1Using a wire cutter or old scissors, cut three 6-inch pieces of pipe cleaner. Then cut six 2 1/2-inch pieces, six 2-inch pieces, and six 1 1/2-inch pieces. STEP 2Twist 6-inch pieces together at their midpoints to make a six-spoked asterisk. Tighten twist by clamping down with needlenose pliers. STEP 3Center one 2 1/2-inch piece at the midpoint of a spoke, and twist onto spoke. Tighten twist with needlenose pliers. Repeat on remaining 5 spokes. STEP 4About 1/2 inch from an arm attached in step 3 (toward spoke's tip), center one 2-inch piece, and twist onto spoke. Tighten twist with needlenose pliers. Repeat on remaining 5 spokes. STEP 5About 1/2 inch from an arm attached in step 4 (toward spoke's tip), center one 1 1/2-inch piece, and twist onto spoke. Tighten twist with needlenose pliers. Repeat on remaining 5 spokes. Trim arms if needed.STEP 6To hang, glue a loop of cord to the back of a spoke.

